
I love ginger and warm, spicy flavors. A neighbor once gave us some amazing gingerbread. I liked it better than any other gingerbread I had ever experienced. It served as the starting point for this delicious vegan waffle recipe.
A friend’s winter solstice gathering provided the motivation to create the waffle recipe. I had been in the mood for a waffle party, and I was also craving gingerbread. So I thought, why not take the waffle party on the road again, and bring a mini holiday waffle party to the solstice gathering?
I initially thought about asking the hosts if I could bring a waffle maker. But that seemed logistically complicated, and I didn’t want to distract from other aspects of their gathering.
I recalled how I had done my birthday waffle cake gathering atop a dormant volcano, prepping the waffles in advance. Many waffles begin to lose their structure a while after baking. But when prepared properly, cake-like dessert waffles with a high rice flour content hold up and retain a pleasant mouthfeel.
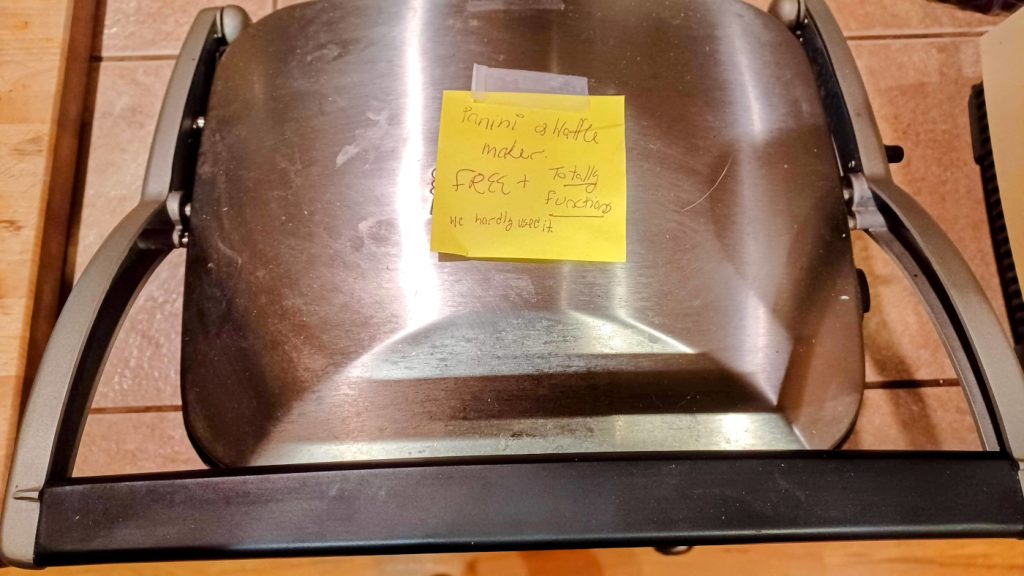
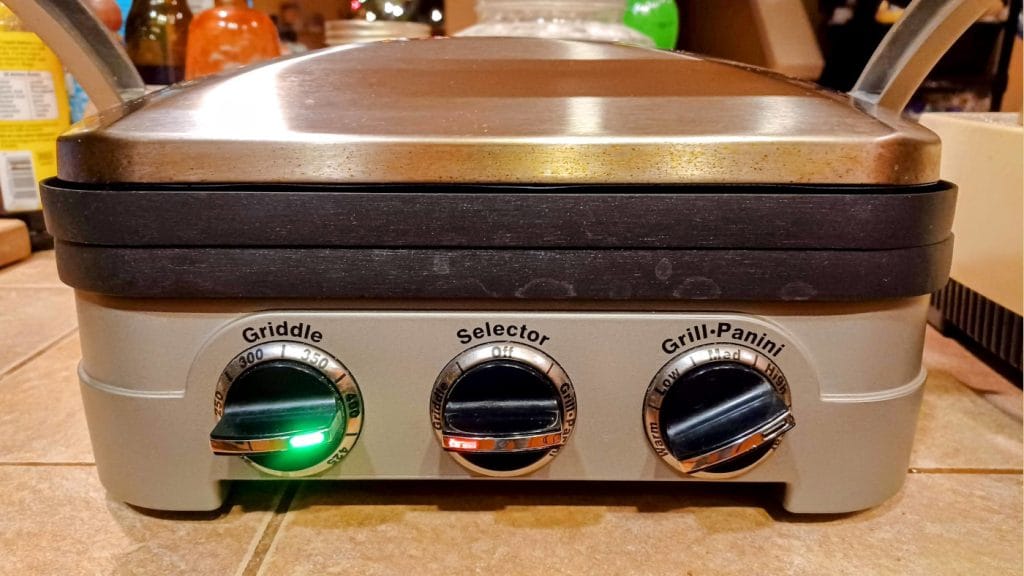
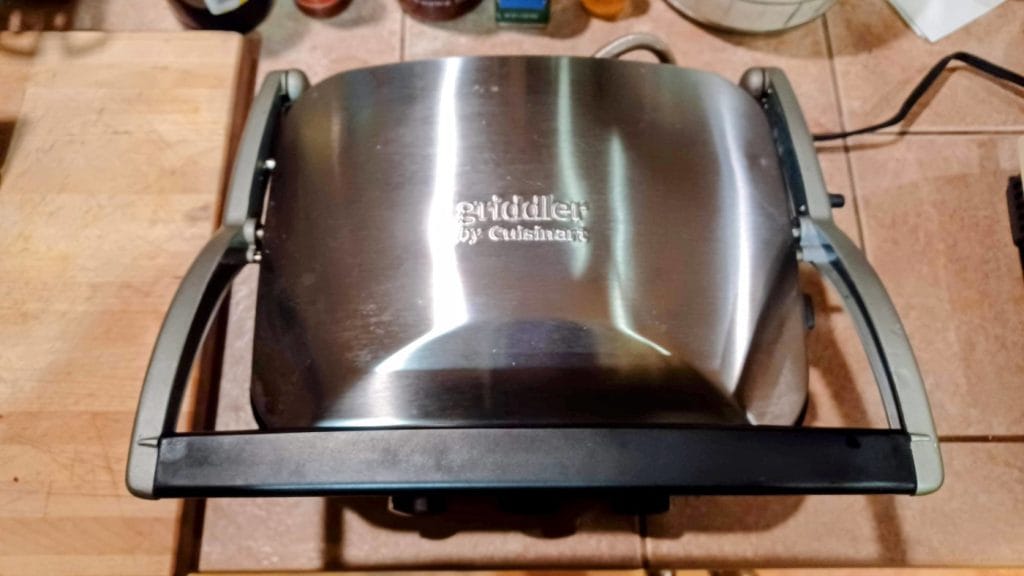
Lurking in the garage was the perfect tool for concocting these delicious vegan waffles: a barely-used Cuisinart Griddler I had recently obtained. While out for a walk one day, I had spotted it next to a nearby sidewalk. (Leaving free items near the curb is common in Portland.) It had the waffle grill plates that are usually an extra add-on. It was meant for me! I include some thoughts on this waffle maker further below.
Baking Tricks
I used a few baking tricks in making the vegan gingerbread waffles.
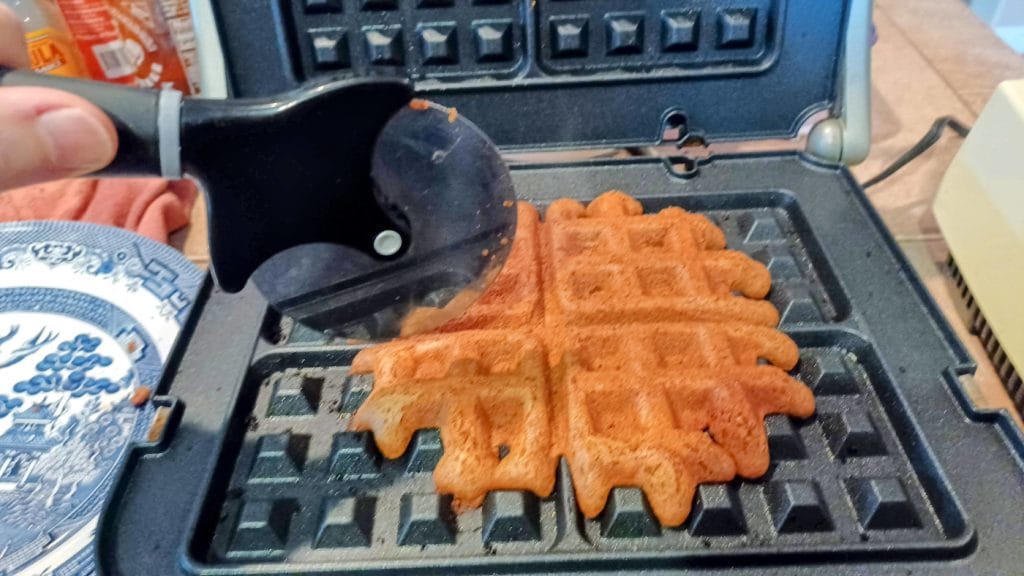
First, because they are very soft right after baking and break apart somewhat easily, I gently cut them into quarters with a pizza cutter before lifting them off the iron with a pair of chopsticks. The smaller pieces are easier to lift out without them falling apart.
Just don’t press down too hard with the pizza cutter so you don’t damage the waffle maker’s non-stick surface. Also, don’t use a knife instead of a pizza cutter, as you’re more likely to damage the non-stick surface.
Second, I transfer the waffles directly onto a metal cooling rack after baking. I allow them to cool for at least 10 minutes before transferring to a plate. This allows any water to evaporate so that they don’t become slightly soggy on the bottom. This isn’t generally an issue for waffles that are served right away, but it can present a problem for waffles made hours in advance.
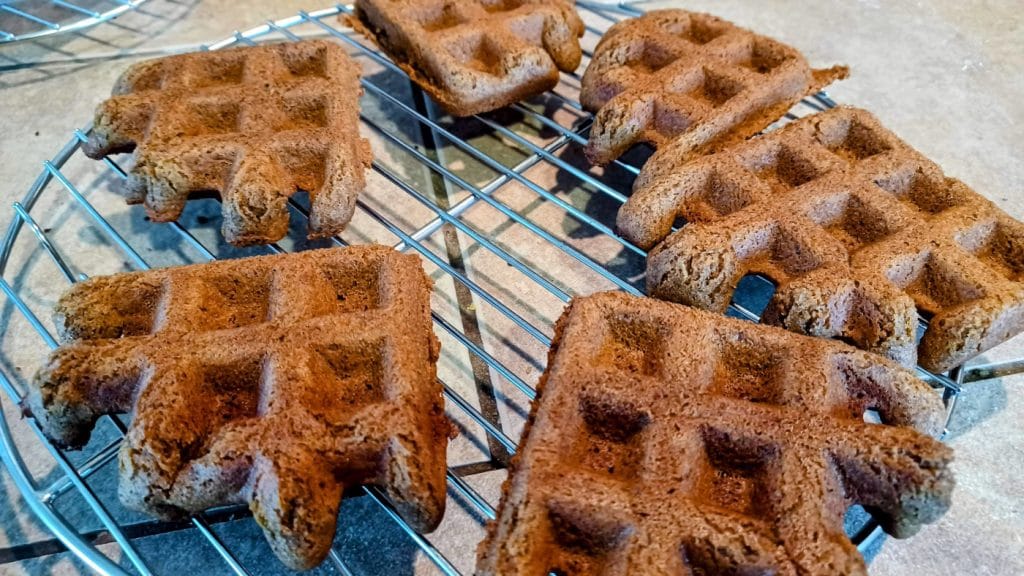
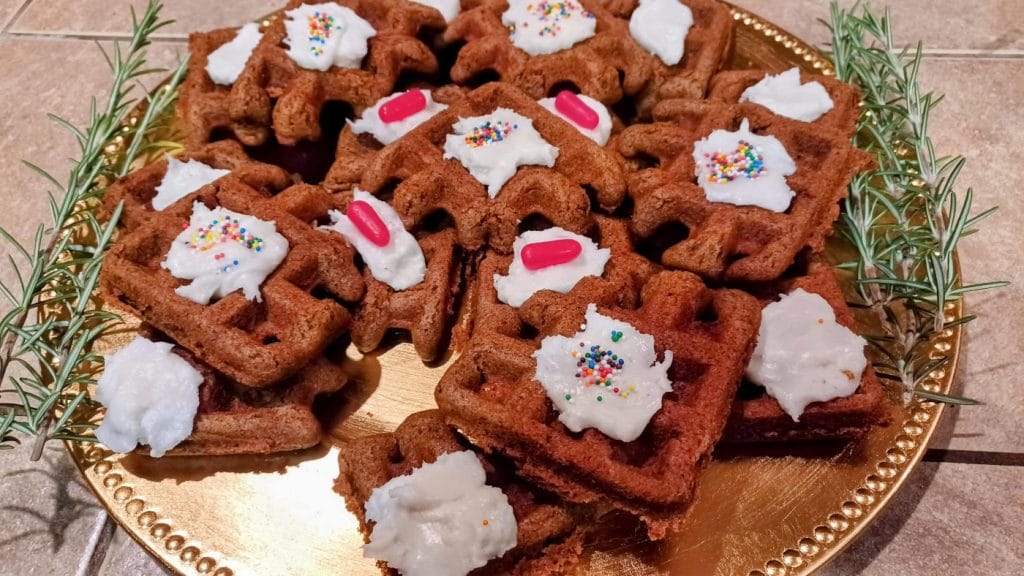
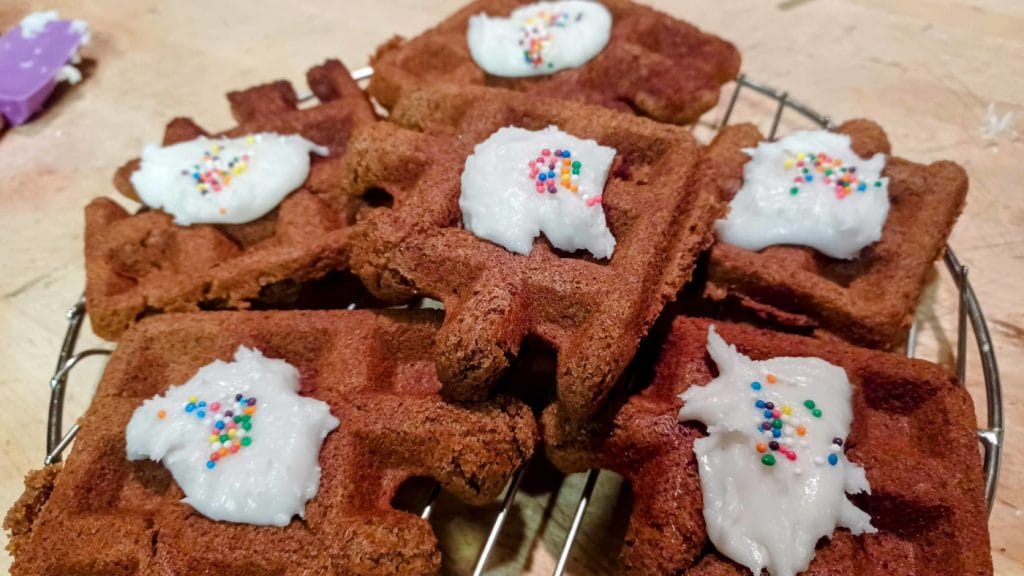
The Delicious Pile of Gingerbread Waffles
I was very pleased with how the waffles turned out. Because the frosting is quite sweet, I put just a dollop on each waffle piece. I added a small amount of sprinkles and candy for festive color.


The Wonderful Solstice Party
Our friend’s solstice party was amazing. Alongside wonderful people and company, there was lots of delicious food. I enjoyed bringing some waffle party spirit to the solstice gathering.
The candlelight ritual was soothing, grounding, and connective. The co-host and facilitator created a beautiful altar. She invited me to read “‘Twas the Night Before Yuletide” as part of the ceremony. I was honored and delighted to participate.


Playing Gingerbread Waffle Santa
After sharing delicious vegan gingerbread waffles with friends on solstice, I decided our neighborhood deserved a little waffle party spirit. So on Christmas I played Waffle Santa, baking up gingerbread waffles for several neighbors. I also set aside a few to enjoy over the next few days.
Waffle maker thoughts
After creating the initial version of the recipe and doing a test run the night before, I remembered why I love flip waffle makers–and why I recommend them in the waffle maker discussion section of The Global Vegan Waffle Cookbook. The bottom of the test run waffle cooked more quickly than the top, and I burned it slightly. Not the end of the world, though, as things turned out pretty well following recipe and cook time (reduction from 5 to 3 ½ minutes) adjustments the next day.
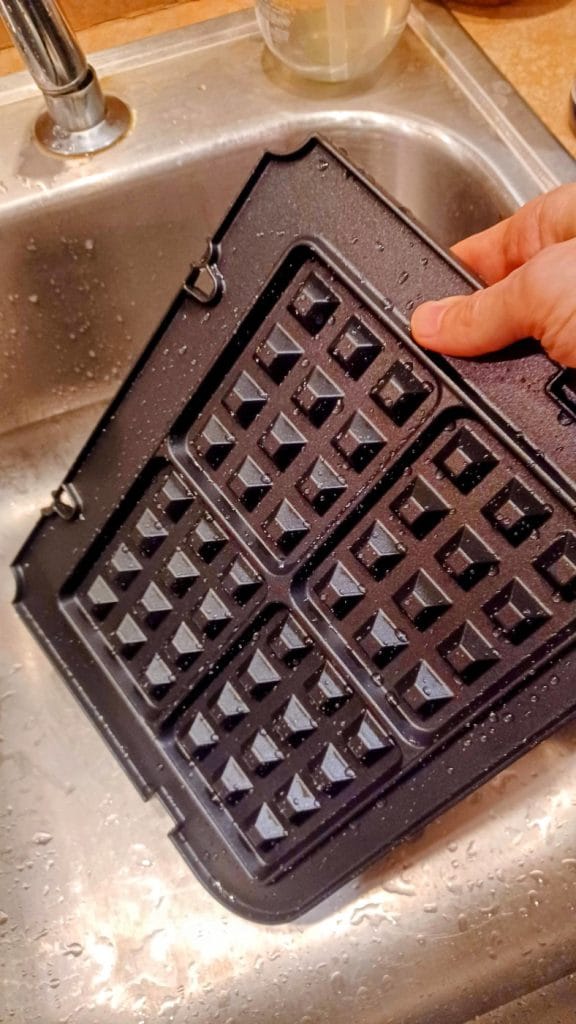
The waffle maker has other features I appreciate, including removable easy-to-clean grills, a temperature adjustment knob, and an LED light to let you know when the waffle maker is fully heated.
The red and green lights look holiday-like together. The Griddler also has a good amount of wattage–1500 watts–that’s not spread over too large an area.
Overall, the Griddler worked quite well for making gingerbread waffles. It was a great find, and I plan to continue using it. In fact, I’ve already used it for chocolate cake waffles, which I’ll detail in an upcoming post.
I’d recommend the Griddler for someone who wants a device that does a few different things including waffles. When purchased new, it usually comes with flat plates for making things like paninis, and the waffle grills are a paid add-on. It would also work well as a backup waffle maker or additional waffle iron for waffle parties.
However, if you like experimenting with thinner waffle batters, enjoy crispy exteriors with even toasting on both sides, or dream of deep pockets for syrup and other waffle toppings, it’s hard to beat a good flip waffle maker. I recommend this Cuisinart flip waffle maker, which is a successor to the now-discontinued Waring Pro makers I’ve used for many years; or this Presto waffle maker, if you want something slightly more compact and don’t need the temperature adjustment knob.
For more detailed vegan waffle maker tips and suggestions, see The Global Vegan Waffle Cookbook or my article “What is the Best Waffle Maker for Vegan Waffles?”

Spicy-Sweet Gingerbread Waffles (Gluten-Free, Vegan)
Ingredients
Method
- Combine the rice flour, tapioca flour, almond meal, baking powder, baking soda, ginger, cinnamon, cloves, salt, black pepper, and cardamom in a large bowl and stir with a whisk.
- Combine the water, ground flaxseed, brown sugar, oil, molasses, and vanilla extract in a medium bowl and mix thoroughly.
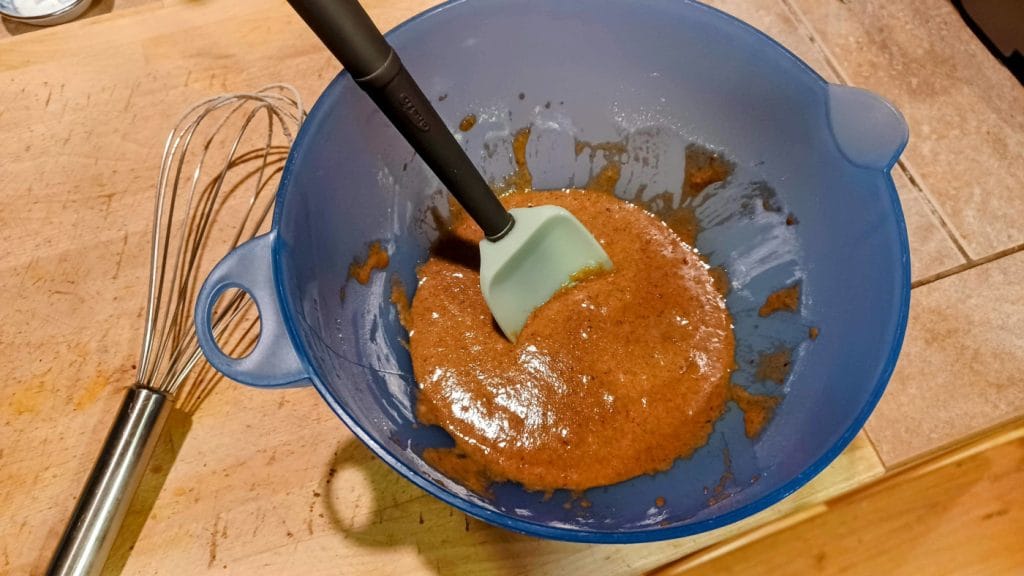
- Pour the liquid mixture into the flour mixture and stir until well blended, and any large clumps of rice flour are gone.
- Let the waffle batter stand for 3 to 5 minutes while preheating a waffle maker according to the manufacturer’s directions. This will allow the rice flour to absorb a bit more of the moisture, and will allow the flaxseed to thicken the batter a bit.
- Stir the batter a bit more if necessary to get rid of any remaining rice flour clumps.
- Spray both grids of the waffle iron very generously with oil. Pour or ladle the batter onto the center of the iron. If the first waffle is either too small or significantly overflowing, just adjust accordingly for subsequent waffles.
- Bake each waffle for 3 to 5 minutes, or until it can be removed easily, spraying both grids generously with oil prior to each waffle.
- If the waffle falls apart when trying to remove it all at once, quickly and gently cut the waffle into quarters with a pizza cutter while it’s still in the iron, and then lift each quarter out individually with two chopsticks. You may need to lower the baking time slightly since it takes a bit longer to remove the whole waffle this way.
- If desired, top each waffle with a dollop of Sweet Vanilla Frosting (recipe below).
Notes

Sweet Vanilla Frosting
Ingredients
Method
- In a small microwave-safe bowl, warm the coconut oil just until melted. This probably shouldn’t require more than 30 seconds. Add the other ingredients and mix with a fork or spatula until well blended.
- It may require some adjusting to get the desired thickness. If it’s too thin, stir in more confectioner’s sugar, no more than one or two teaspoons at a time. If it’s too thick, stir in more water, no more than half a teaspoon at a time.
- Spoon a tablespoon-sized dollop onto the center of each waffle just before serving.